ePay
Using Upodi with ePay tokens is a 3-step process:
- Upodi is configured to work with your ePay account
- A credit card is saved in ePay using one of ePays payment methods and a token is generated
- A payment method is added to a customer in Upodi using the credit card token generated by ePay
Step 1: Configure Upodi to work with your ePay account
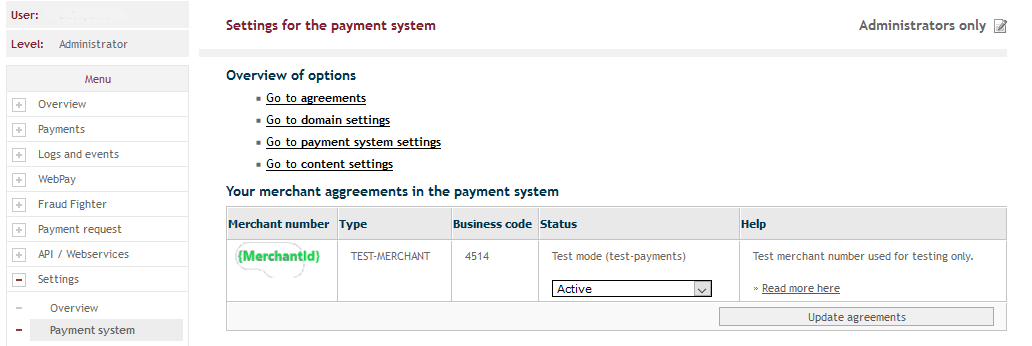
- Find your merchant id in ePay (Settings -> overview):

- Create password for the ePay web-service and add the IP-addresses provided by Upodi:
NOTE: The required IP-addresses will be provided by Upodi upon request. Please contact Upodi for further information.
- Set up ePay configuration in Upodi with your merchant id and password (Setup -> Payment Providers -> ePay):
Step 2: Save a credit card in ePay and retrieve credit card token
ePay offers a few options for capturing and saving customers' credit card information. See http://epay.bambora.com/en/subscription-web-service for further information.
For this example we will use the payment winidow as suggested by ePay. To create a payment window we use the following javascript provided by ePay:
<script charset="UTF-8" src="https://ssl.ditonlinebetalingssystem.dk/integration/ewindow/paymentwindow.js" type="text/javascript"></script>
<script type="text/javascript">
     paymentwindow = new PaymentWindow({
         'merchantnumber': "{MerchantId}",
         'amount': "0",
         'currency': "DKK",
		 'subscription': "1",
     'accepturl': "http://webhook.site/d20f5646-3cdc-4b1e-935e-28fab2643f98"
     'cancelurl': "http://{cancelurl}"
     'callbackurl': "http://{cancelurl}"
     });
</script>

<input onclick="javascript: paymentwindow.open()" type="button" value="Go to payment">
In this example we only want to save the card for future use by Upodi, which is why the amount is set to "0". Instead we set the parameter 'subscription' to "1". This way the payment window will create a new subscription in ePay, which we can charge from Upodi later on.
If implemented correctly on your website, the payment window should look approximately like this:
When the form is submitted a new subscription is created in ePay and a request is sent to the designated 'accepturl'. This request contains a variety of information about the newly created ePay subscription. The most important piece of information here is the 'subscriptionid' which is sent as a form value. This is the credit card token that Upodi needs in order to charge the customer.
Note that you can also designate a 'cancelurl' and 'callbackurl'. See the ePay documentation for further information.
In the example above we use http://webhook.site to see the content of the request created by the ePay payment window:
In this case, the 'subscriptionid', also known as the credit card token, is 13198744.
Step 3: Add payment method to customer in Upodi
Now that we have a credit card token from ePay, we simply use the Upodi API to add a new payment method using the token mentioned above and the customerid for the specific customer from upodi:
curl -X POST \
  https://api.upodi.io/v3/paymentmethods/{customerid} \
  -H 'Accept: application/json' \
  -H 'Authorization: Bearer {Base64EncodedUpodiAPIKey}' \
  -H 'Content-Type: application/json' \
  -d '{
  "type" : 64,
  "makedefault" : "true",
  "puretoken" : {
  	"token" : "{credit card token}",
  	"paymentgateway" : "epay"
  }
}'
Voilá! You have now set a new payment method for the specific customer using the ePay credit card token! Note that we set the new payment method to default, so any future subscriptions for this particular customer will be charged from this payment method.
Updated almost 4 years ago
