Vipps MobilePay Subscriptions
Let customers sign up with a single swipe
Vipps MobilePay Subscriptions is a wallet-type payment method well known and loved by Danish and Finnish users. Upodi makes the integration to the service from your customer-facing front-end easy, as everything regarding the Vipps MobilePay Subscriptions integration happens with just one or a few calls to the Upodi API depending on your needs.
Once Vipps MobilePay Subscriptions are enabled on your platform in the payment-provider-section of Upodi you can start initiating new Vipps MobilePay Subscription Agreements sent directly to the customers.
Step 1: Create initial subscription payment (Optional)
If the subscription requires an initial cost associated with the sig-up flow you need to create that as a stand-alone invoice which contains the initial costs.
curl --request POST \
     --url https://api-front.upodi.io/Invoices \
     --header 'Accept: application/json' \
     --header 'Authorization: Bearer  {ApiKey}' \
     --header 'Content-Type: application/json' \
     --header 'X-version: {version}' \
     --data '
{
     "invoiceLines": [
          {
               "title": "First purchase",
               "description": "Your initial payment in relation to your MobilePay Subscription purchase",
               "quantity": 1,
               "unitPrice": 99,
               "sku": "10-200",
               "periodStart": "2021-10-06 22:00:00.000",
               "periodEnd": "2021-11-05 22:00:00.000"
          }
     ],
     "customerID": "521227bf-d309-4a4f-ac49-a986feacfac8",
     "subscriptionID": "e5122f6c-ded7-45c0-b8c3-b1664d13f850",
     "currencyCode": "DKK",
     "invoiceDate": "2021-10-06 22:00:00.000"
}
'
It is okay to have the invoice in 'draft' mode for the next steps.
Step 2: Create PaymentMethod in Upodi
By creating the payment method you instantiate the prompt for the end-user:
curl --location --request POST 'https://api-front.upodi.io/PaymentMethods' \
--header 'X-version: {version}' \
--header 'Content-Type: application/json' \
--header 'Authorization: Bearer {ApiKey}' \
--data-raw '{
    "customerID": "{customerId}",
    "gateway": "mobilepaysubscriptions",
    "source": "{\"title\":\"My title\",\"description\":\"My description\",\"phonenumber\":\"+4512345678\",\"currency\":\"DKK\",\"countryCode\":\"DK\",\"userRedirectUrl\":\"https://acceptredirecturl.com\",\"UserCancelRedirectUrl\":\"https://usercancelredirecturl.com\",\"invoiceID\":\"{InvoiceID}\",}",
    "makeDefault": false
}'
Title: This is the headline on the purchaseDescription: Describes the productPhonenumber: The phone number associated with the customers' MobilePay accountCurrency: Only 'DKK' and 'EUR' supportedCountryCode: Only 'DK' or 'FI' supportedUserRedirectUrl: Where the user is redirected if they accept or reject the purchaseUserCancelRedirectUrl: Optional: Where the user is redirected if they click info > manage agreement in the MobilePay Application. It should be possible to cancel the agreement by visiting this link. If not supplied the end-customer can delete the agreement directly in the Mobilepay App.InvoiceID: Optional ID of the invoice which contains the initial purchase. If not provided the customer simply swipes okay to the subscription but with no initial cost
The response will be a Payment Method Object, where PaymentData contains an important MobilePayRedirectUrl:
{
    "Issuer": "mobilepaysubscriptions",
    "CustomerID": "521227bf-d309-4a4f-ac49-a986feacfac8",
    "PaymentMethodType": 8,
    "PaymentMetaData": "{\"MobilePayRedirectUrl\":\"https://open.mobilepay.dk:443/usersettings-landing-website/?token=6376920420533355&countryCode=DK&product=RecurringPayments\"}",
    "Status": 1,
    "ID": "aac19d59-269e-49fe-9b8d-02332af16f18",
    "CreatedDate": "2021-10-07T11:53:16.2722648Z",
    "ModifiedDate": "2021-10-07T11:53:16.2722648Z"
}
Step 3: Redirect the customer to the redirectUrl
Here the customer will be prompted to input their phonenumber if it was not already provided in the agreement and once they proceed from here the prompt in the MobilePay application will pop-up for them.
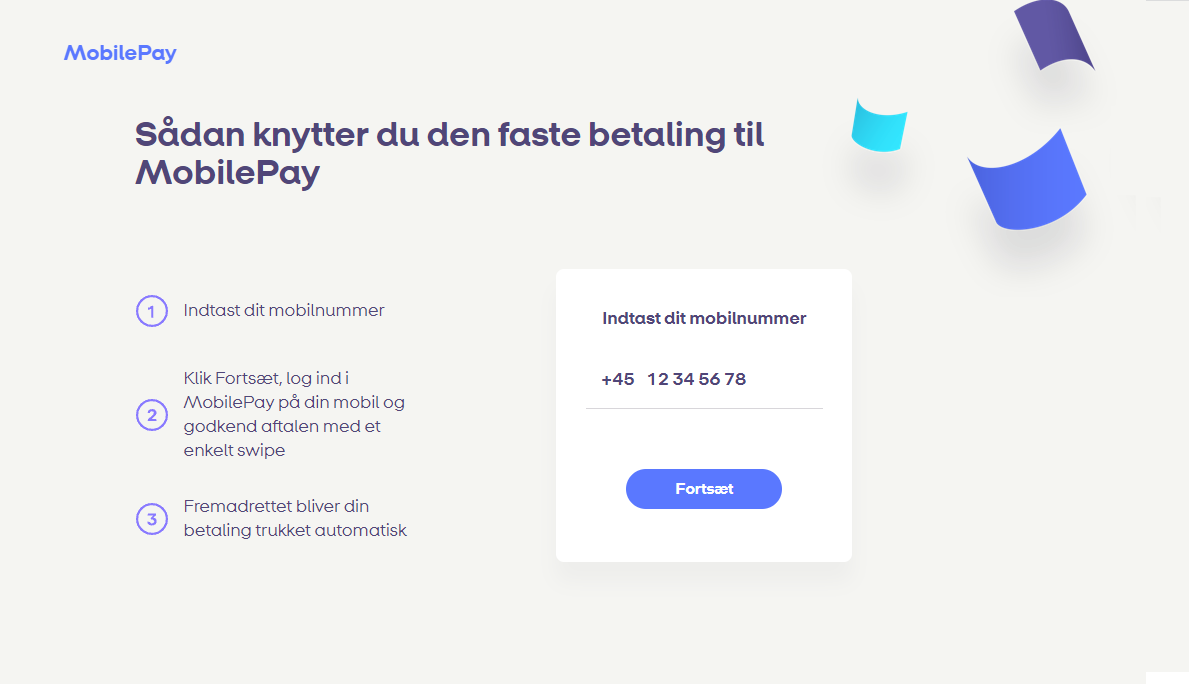
The mobilepay redirectUrl
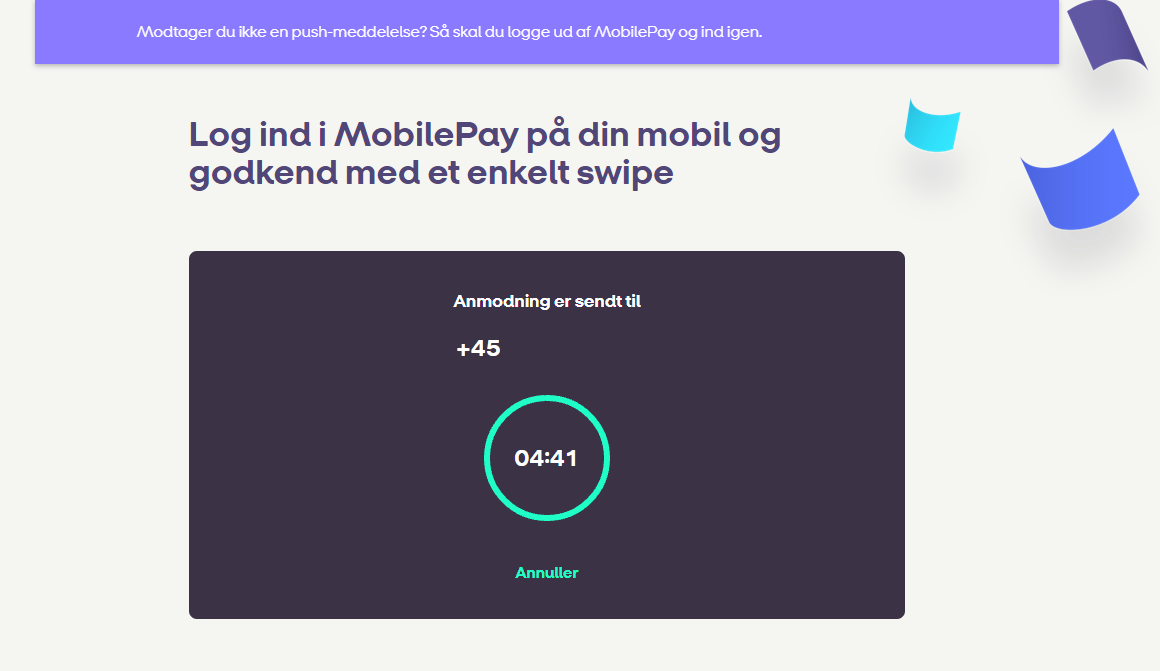
The screen while awaiting an accept or a decline. Afterwards the user is redirected to the UserRedirectUrl
On the mobile phone application:
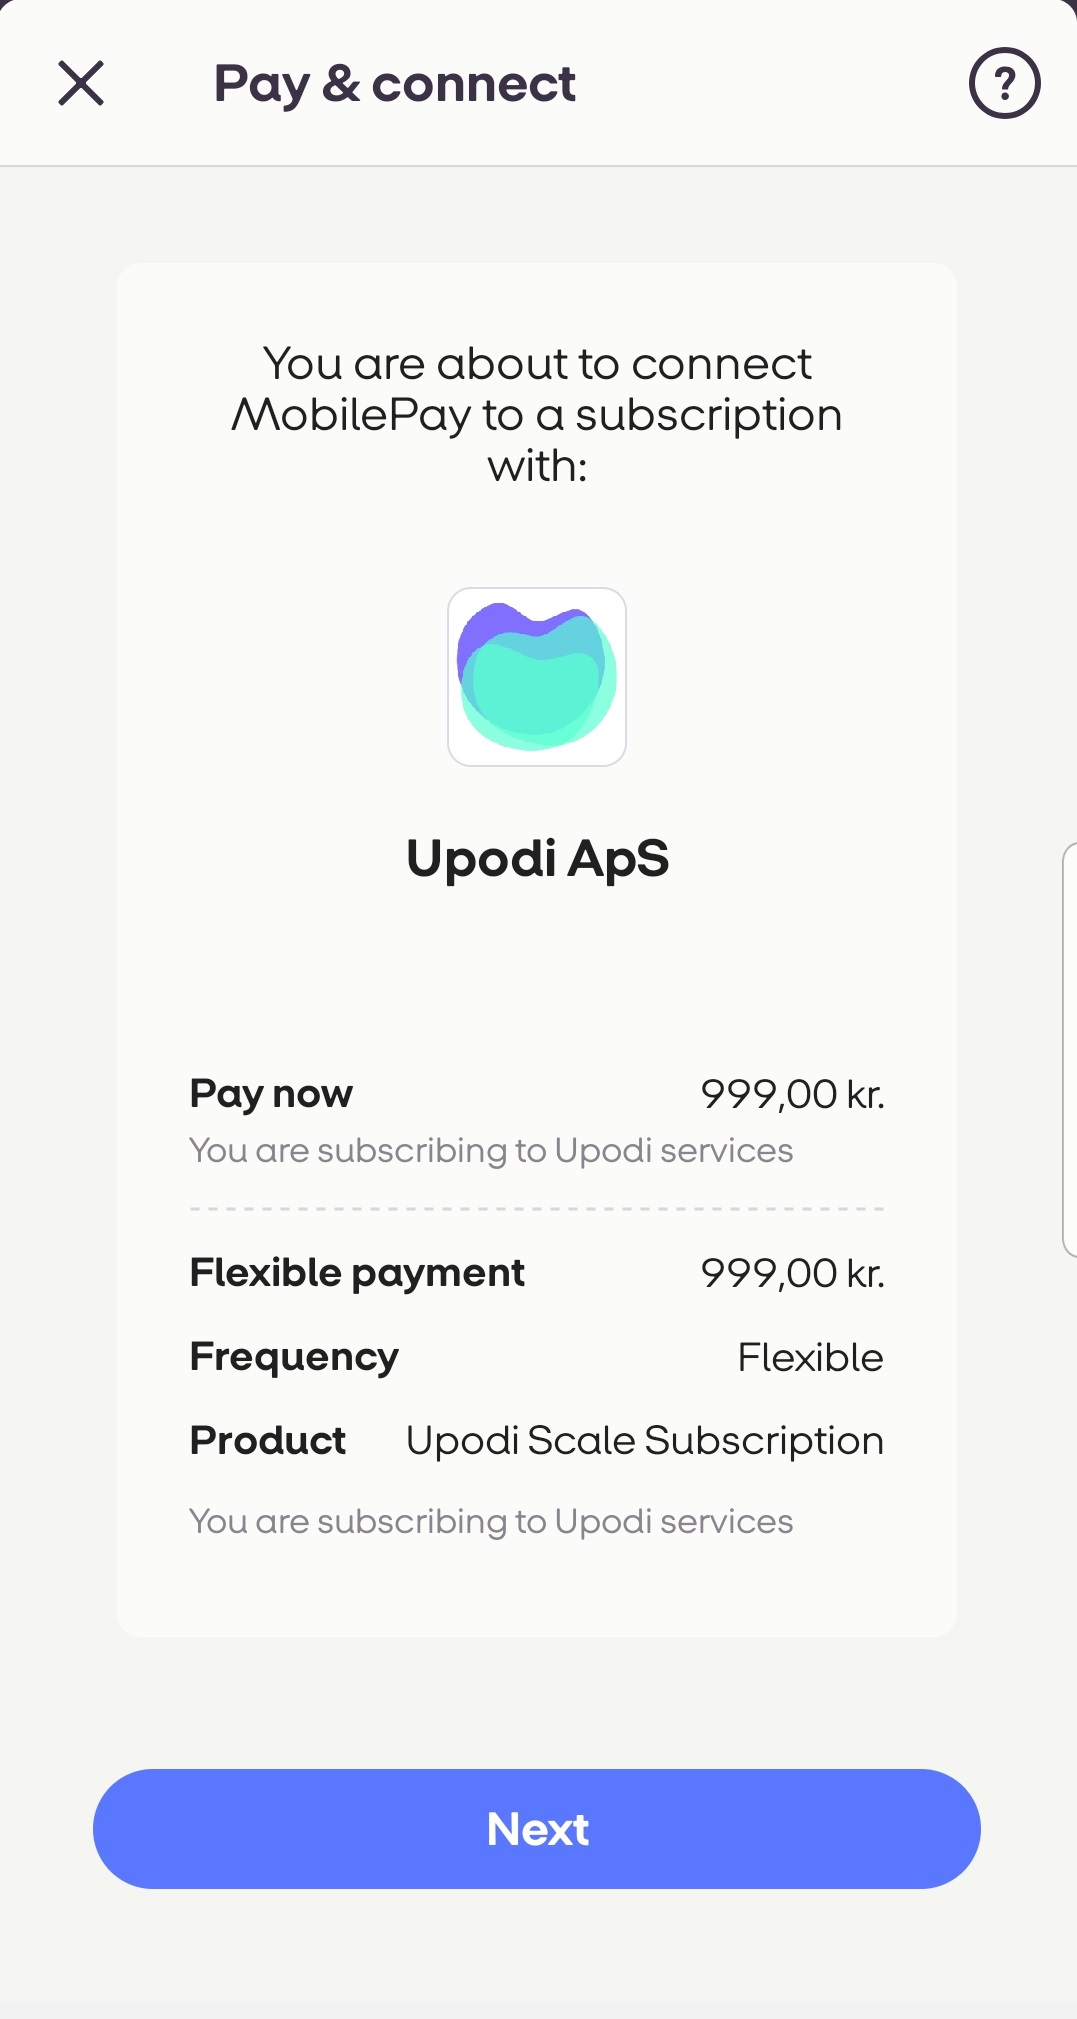
The agreement with the details provided pops up in the user application
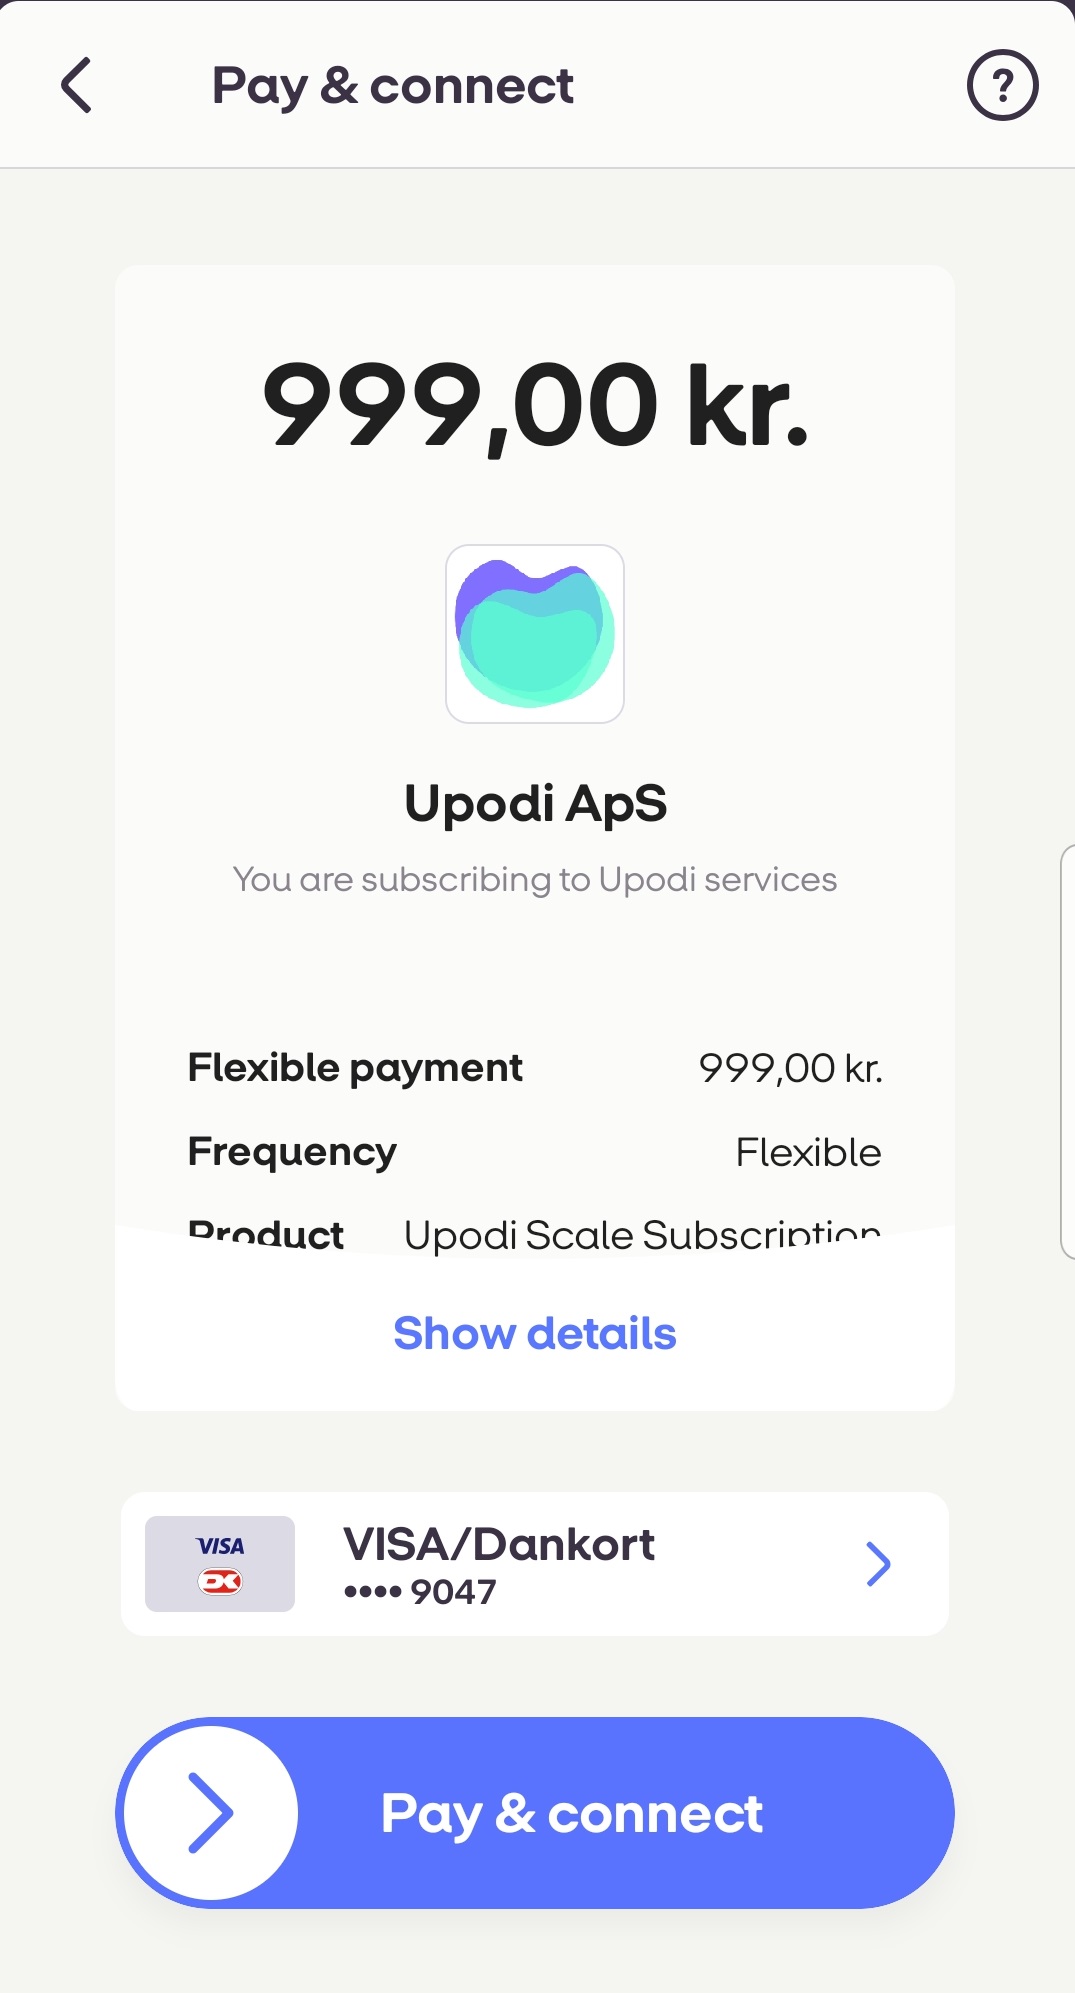
The initial payment has to be accepted if InvoiceID was supplied in step 2
If the customer accepts, rejects or times out the customer is redirected to the inputted UserRedirect
Step 4: Catch the accepted or rejected response from the customer
Customer response:
Once the payment method changes status to accepted or rejected this also sends a webhook containing that information:
{
  ...
  "Time": 132797136553754236,
  "Action": "update",
  "Issuer": {
    "Url": "/paymentmethod/update/{paymentMethodId}",
    "Identifier": "b26d015d-69f7-4e9f-9323-ade095d7cc50"
  },
  "Data": {
    "FullName": "MobilePay Subscriptions",
    "Issuer": "mobilepaysubscriptions",
    "CustomerID": "{CustomerId}",
    "PaymentMethodType": 1168,
    "Status": 1
    ...
  },
  "Type": "PaymentMethod"
}
"Status": 1 (active)
"Status": 50 (rejected)
Step 5: Create subscription for Customer
Once the agreement is accepted and the first payment has been conducted it's time to schedule all the upcoming charges.
curl --location --request POST 'https://api-front.upodi.io/Subscriptions' \
--header 'X-version: {version}' \
--header 'Content-Type: application/json' \
--header 'Authorization: Bearer {ApiKey}' \
--data-raw '{
    "startDate": "2021-08-10T00:00:00.000Z",
    "customerID": "{CustomerID}",
    "productPlanID": "{Productplan}",
    "paymentMethodID": "{paymentMethodID}",
    "subscriptionNumber": null,
    "endDate": null
}'
PaymentMethodID has to be the subscription payment method created in step 2.
Step 6: Skip first payment (Optional)
This step is only necessary if you chose to add an invoice to the initial agreement purchase in step 1 and now want to have the subscription skip that initial invoice.
First find all the active charges on the subscription that should not be billing now upon activation.
curl --location --request PUT 'https://api-front.upodi.io/Subscriptions/{SubscriptionId}/activate' \
--header 'X-version: {version}' \
--header 'Content-Type: application/json' \
--header 'Authorization: Bearer {ApiKey}' \
--data-raw '{
    "sendEmail": true,
    "chargeSettings": [
        {
            "SubscriptionChargeID": "{SubscriptionChargeId}",
            "SkipPeriods": 1
        }
    ]
}'
Switch Plan for the Customer
If you want to also use MobilePay Subscriptions while also having support for upgrading the plan, you have to be aware that these types of payments will trigger an immediate payment for the agreement holder to accept immediately. This is because in order to withdraw money immediately, we have to give the end-customer a pop-up to accept, or else we would have to wait two days for the payment to be accepted. First you have to configure your product plans for Switching plans. Then you switch it
curl --location --request PUT 'https://api-front.upodi.io/Subscriptions/{SubscriptionId}/switchplan' \
--header 'X-version: {version}' \
--header 'Content-Type: application/json' \
--header 'Authorization: Bearer {ApiKey}' \
--data-raw '{
    "prorate": {
        "pricingStrategy": 0,
        "action": 2
    },
    "toPlanId": "{ProductPlanID}",
    "BookAndPayOptions": {
        "PayUsingDefault": true
    }
}'
In this case the invoice response will contain a URL that you need to present to your end-customer in the Invoice.PaymentReference field:
{
  "CustomerID": "{guid}",
  "ID": "{guid}",
  ...
  "PaymentDescriptor": "https://open.mobilepay.dk:443/usersettings-landing-website/?token=a2499c2b-6e15-464564ryrr4f13cceae&countryCode=DK&product=RecurringPayments",
}
Again you will receive webhooks regarding the success or failure of the switch.
In case of failure you can decide if you want to switch the customer back to the original plan or if you want to perform dunning on the outstanding invoice.
Downgrade
Downgrades never include any up-front payment, so they would not require an accept on the agreement
Customer management
Payments
The customer has an overview of all payment conducted by the agreement.
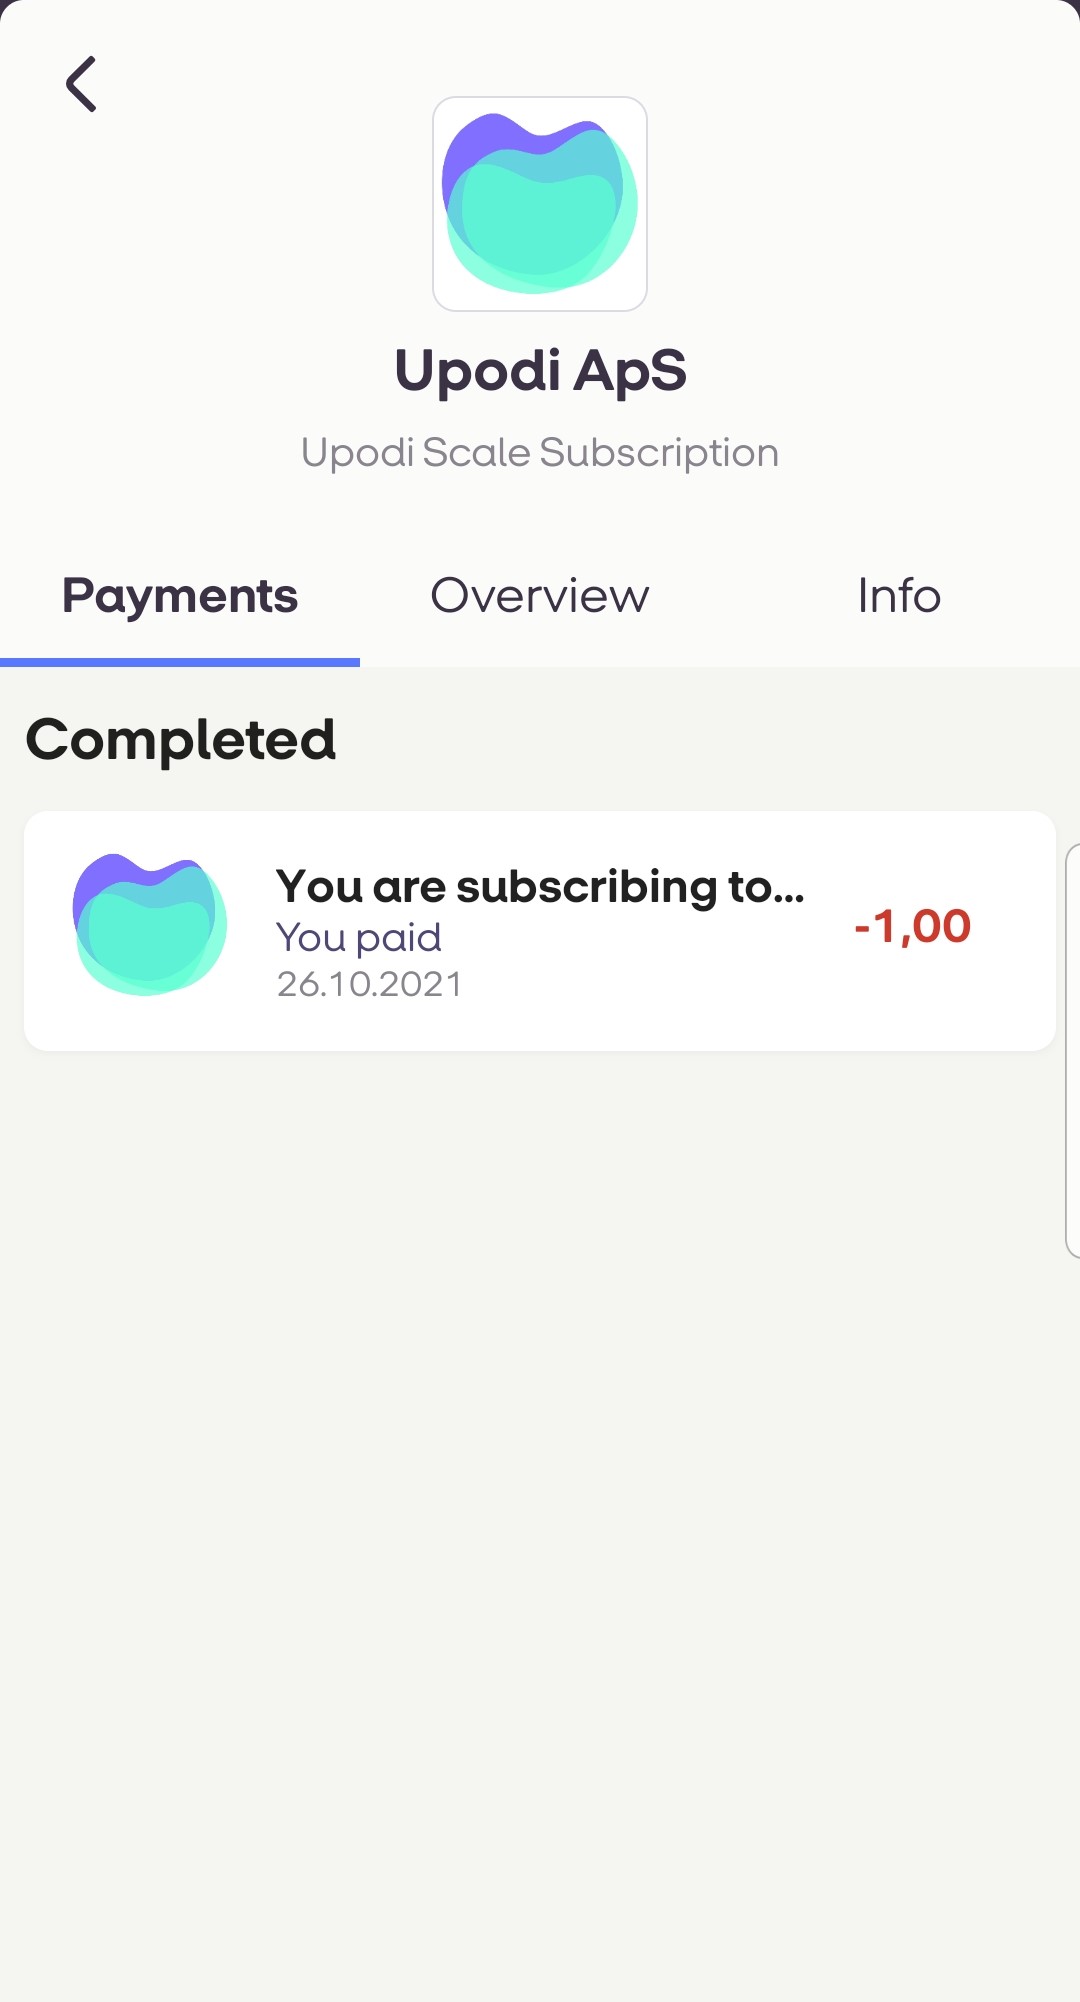
Complete payment overview
Overview
The overview has some details regarding the agreement.
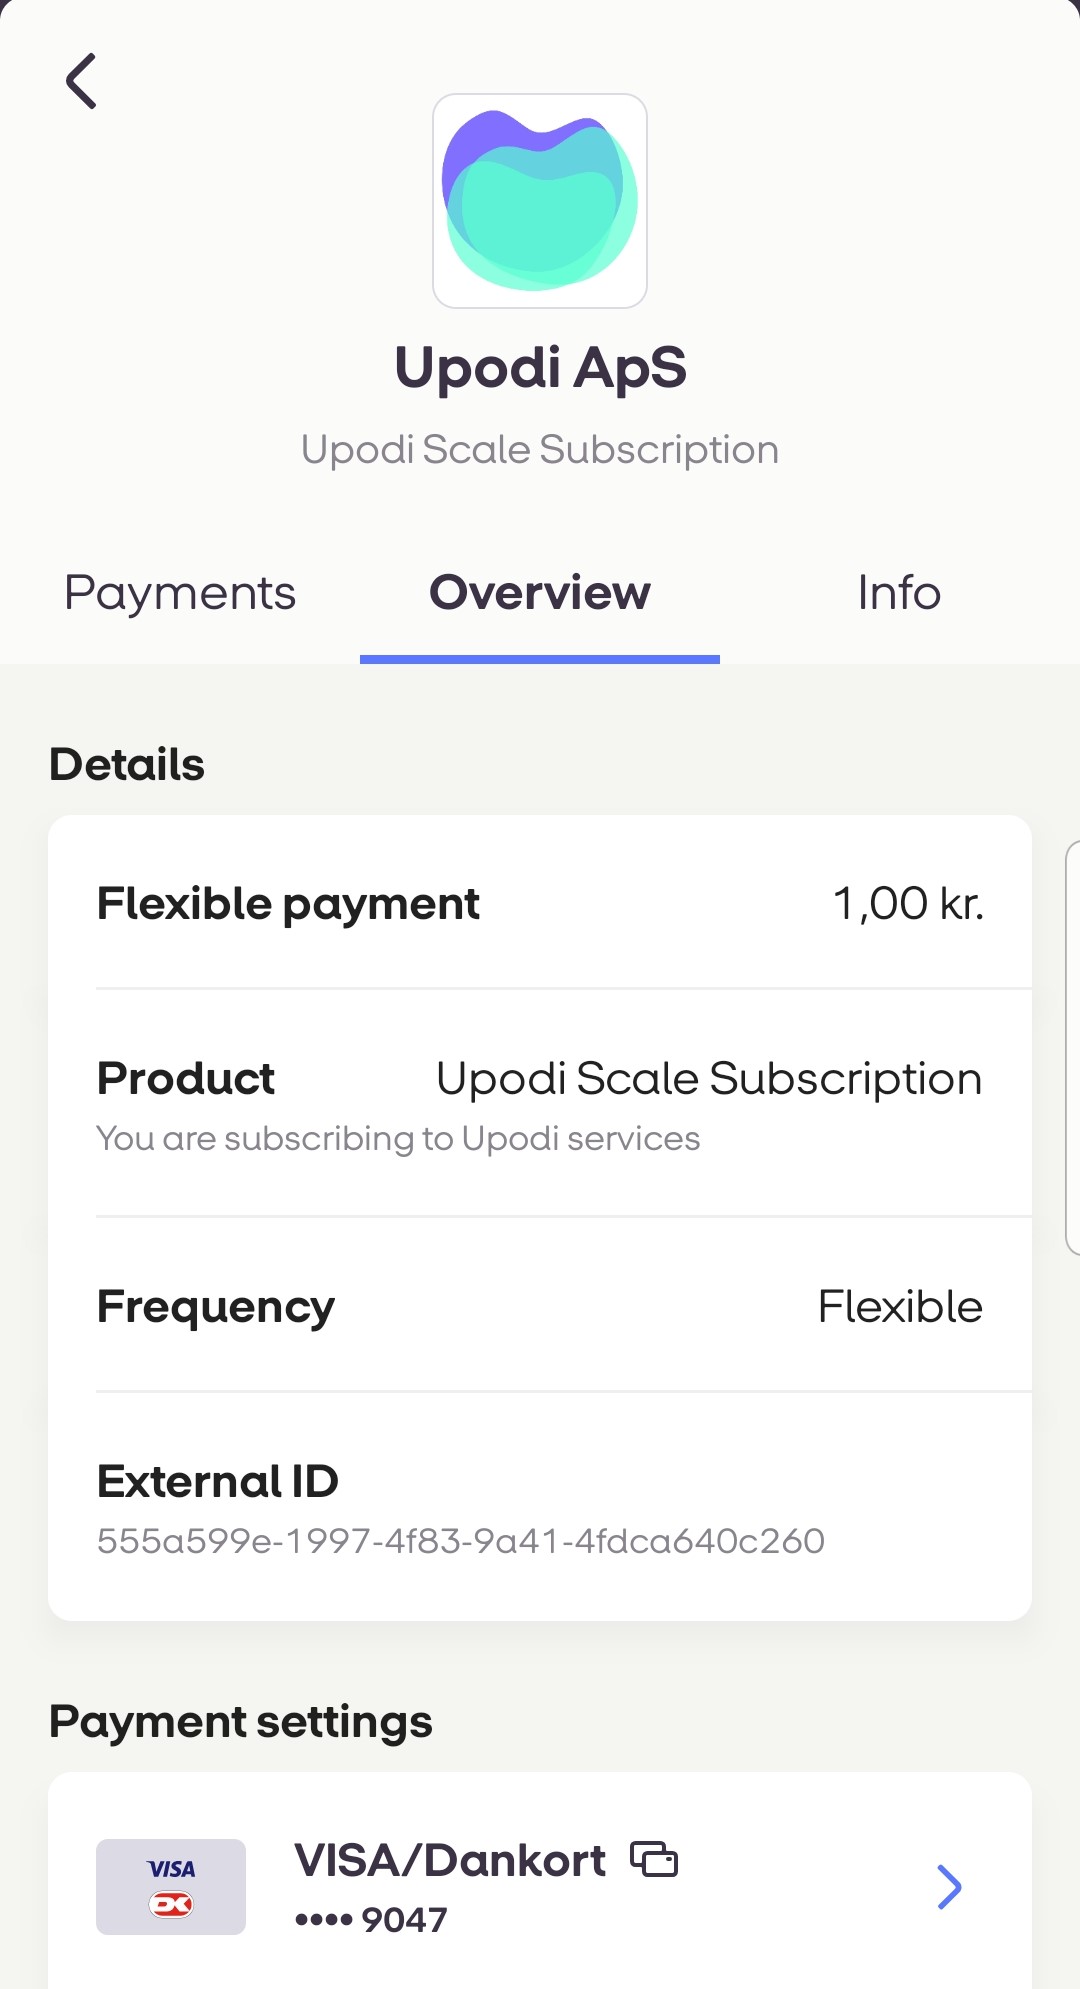
Info
The info page contains links for the customer to reach support, website and more.
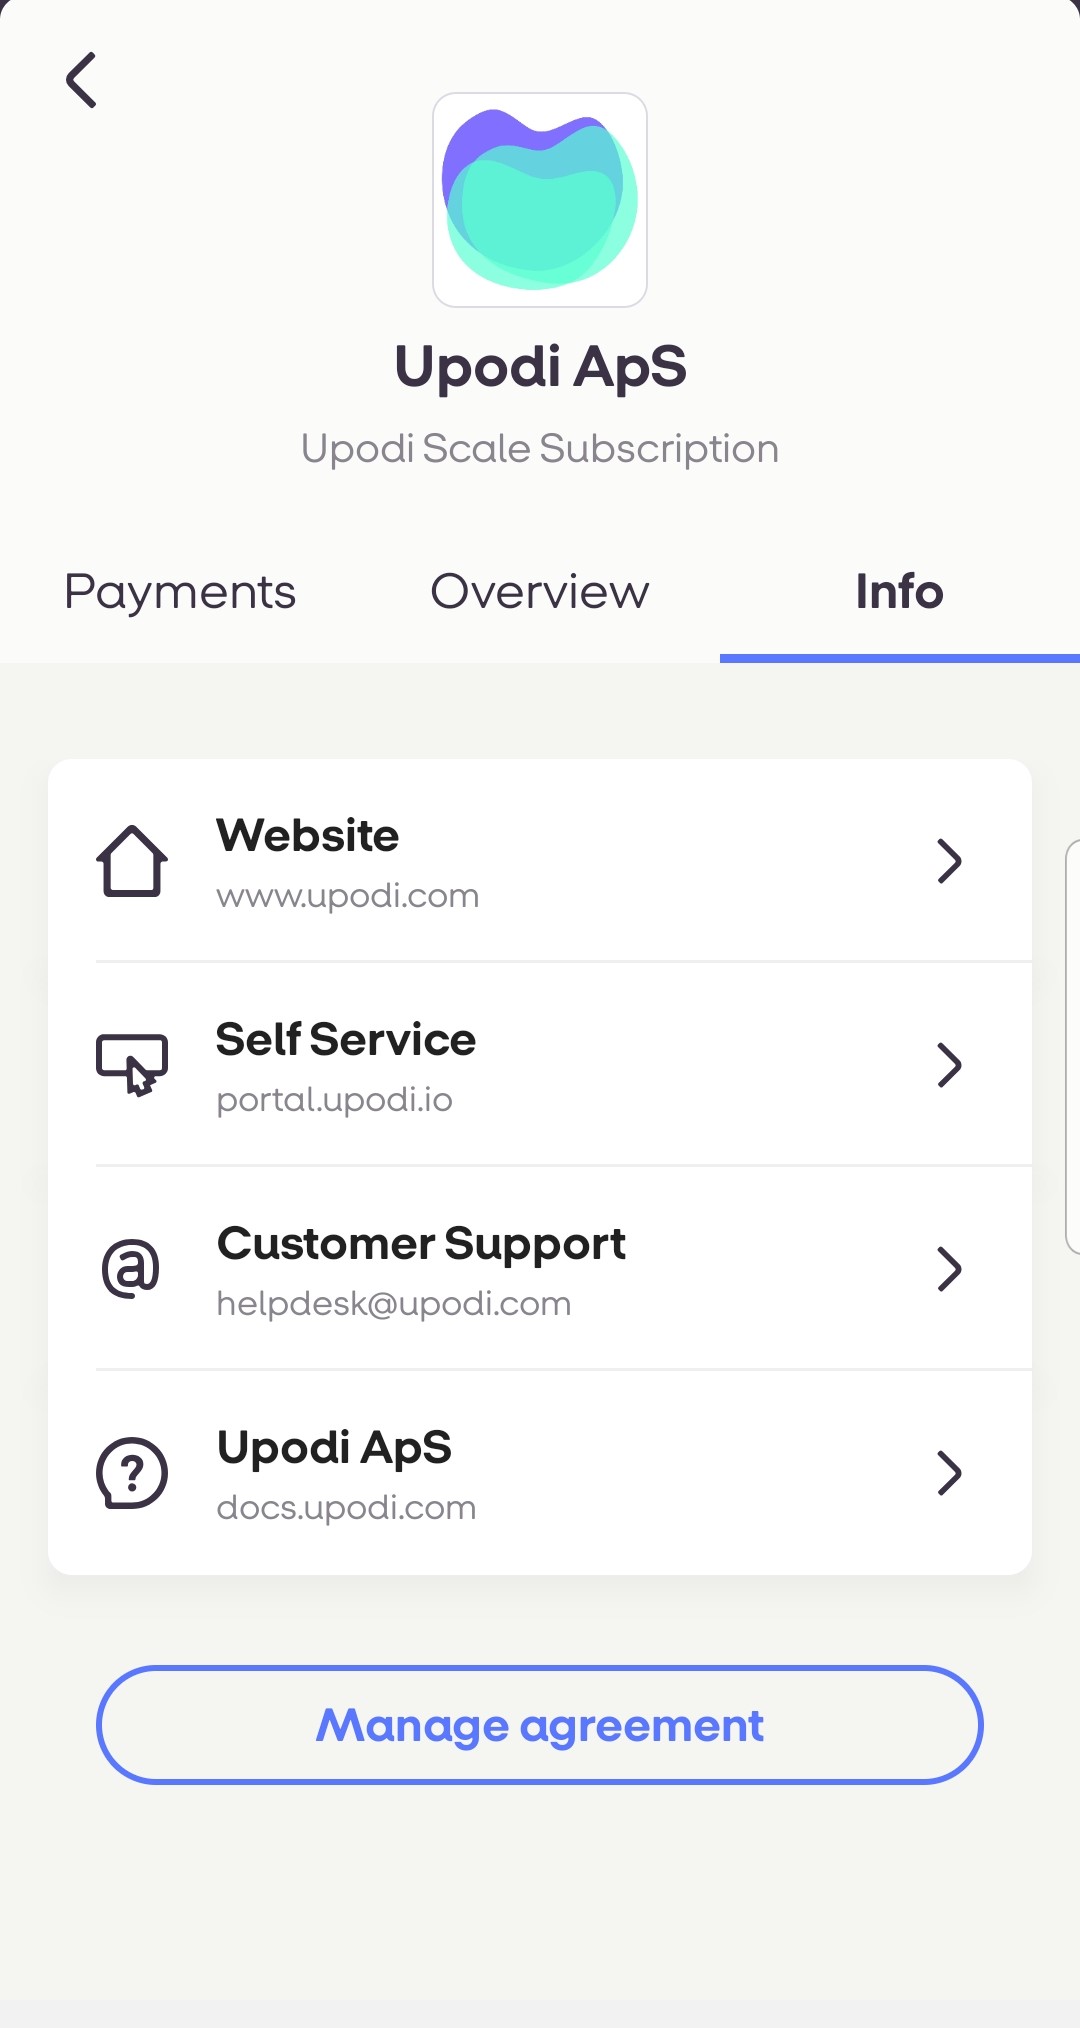
The info screen on the mobilepay application
If the customer clicks 'manage agreement' they are being redirected to the CancelRedirect URL specified on the agreement creation. The rest of the links you have specified in your merchant settings.
Step 7: Delete Agreement
In order to stop a subscription you can just cancel the subscription in Upodi and no further charges will be carried out.
curl --location --request PUT 'https://api-front.upodi.io/Subscriptions/subscriptionId/cancel' \
--header 'X-version: {Version}' \
--header 'Authorization: Bearer {ApiKey}' \
--header 'Content-Type: application/json' \
--data-raw '{
    "CancelOption": 1
}
'
To remove the agreement you have to delete the payment method:
curl --location --request DELETE 'https://api-front.upodi.io/PaymentMethods/paymentMethodId' \
--header 'X-version: {Version}' \
--header 'Authorization: Bearer {ApiKey}'
Implement Upodi Webhooks
On various events concerning the subscription Upodi will notify about these events using webhooks. Create a webhook URL in the Upodi backend here or sign up for webhooks via the API:
curl --location --request POST 'https://api-front.upodi.io/Webhooks/subscribe' \
--header 'X-version: {version}' \
--header 'Content-Type: application/json' \
--header 'Authorization: Bearer {ApiKey}' \
--data-raw '{
    "url": "https://mysite.dk/webhooks/upodiwebhookendpoint"
}'
Updated about 1 year ago
